mac下iTerm终端配置+zsh
记录下来,以后好找,碰到的相关问题
关于iterm配置,很多博客都讲了,但是配置真的遇到了不少问题,我记录下,以后省得再去翻翻找找。
iterm主题
https://github.com/mbadolato/iTerm2-Color-Schemes
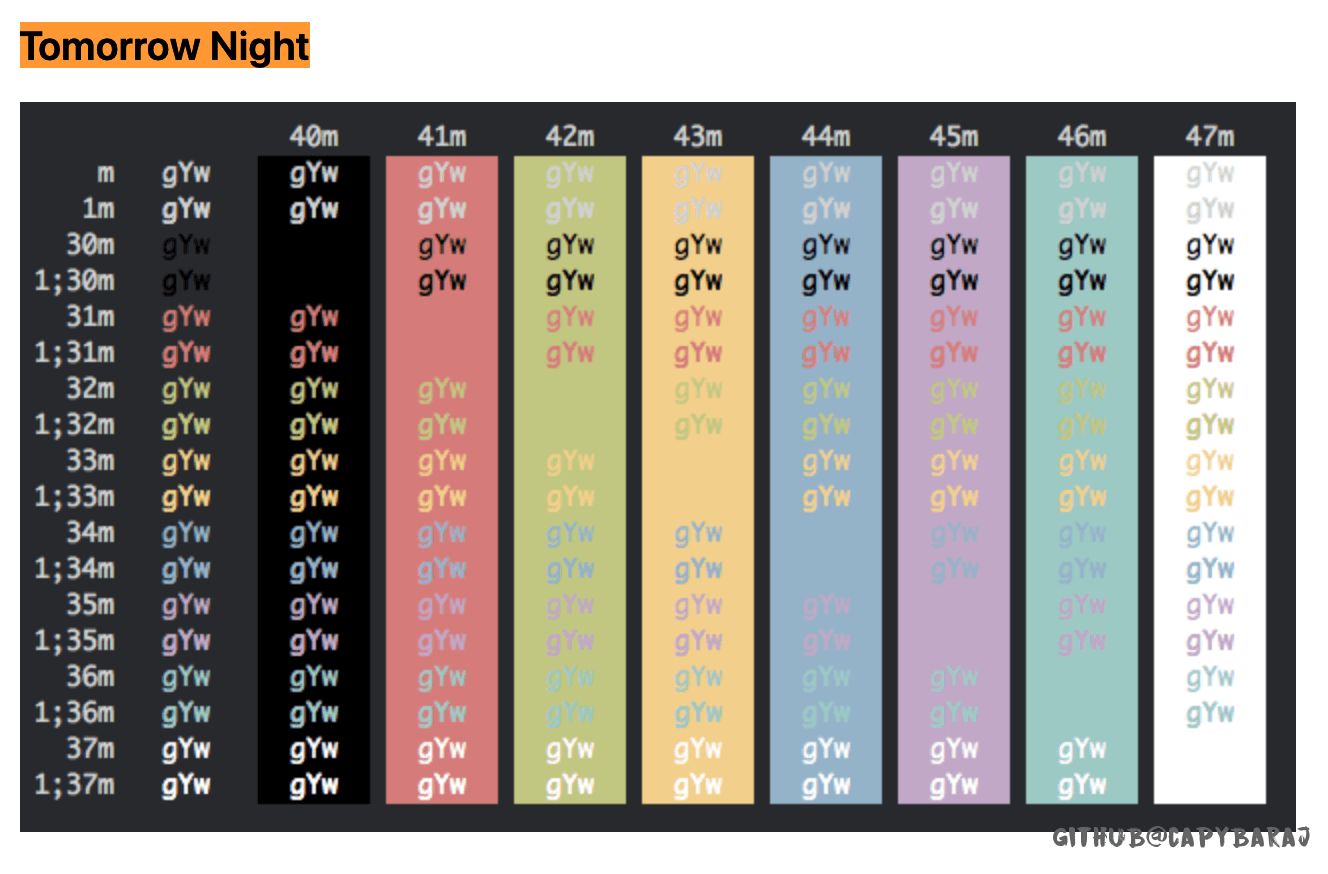
有预览,下载后在iterms下面import一下schemes的文件,我比较喜欢的是Tomrrow night,
背景和透明度自调
下拉式终端配置

zsh配置
这个主要是参考了打造 Mac 下高颜值好用的终端环境
brew install zsh
(多提一句,这个最好挂代理,不然真的很慢,,,要么,就换国内源,不然。。。)
修改默认bash为zsh
1 | sudo sh -c "echo $(which zsh) >> /etc/shells" |
安装oh-my-zsh
1 | sh -c "$(curl -fsSL https://raw.githubusercontent.com/robbyrussell/oh-my-zsh/master/tools/install.sh)" |
此后,我们的配置就在『~/.zshrc』了
zsh配置主题和字体
将主题下载到本地的主题目录中:
1 | git clone https://github.com/bhilburn/powerlevel9k.git ~/.oh-my-zsh/custom/themes/powerlevel9k |
然后修改 zsh 主题配置:
1 | ZSH_THEME="powerlevel9k/powerlevel9k" |
当然,其实也可以换一个主题,这个就是坐着介绍的那个字体

使用 brew 安装
1 | brew tap caskroom/fonts |
注意:安装的时候会去 Github 下载字体,如果你下载失败可能是被墙了。
那么可以通过
https_proxy=127.0.0.1:1087 brew cask reinstall font-hack-nerd-font的方式安装,前提是你开启了代理。
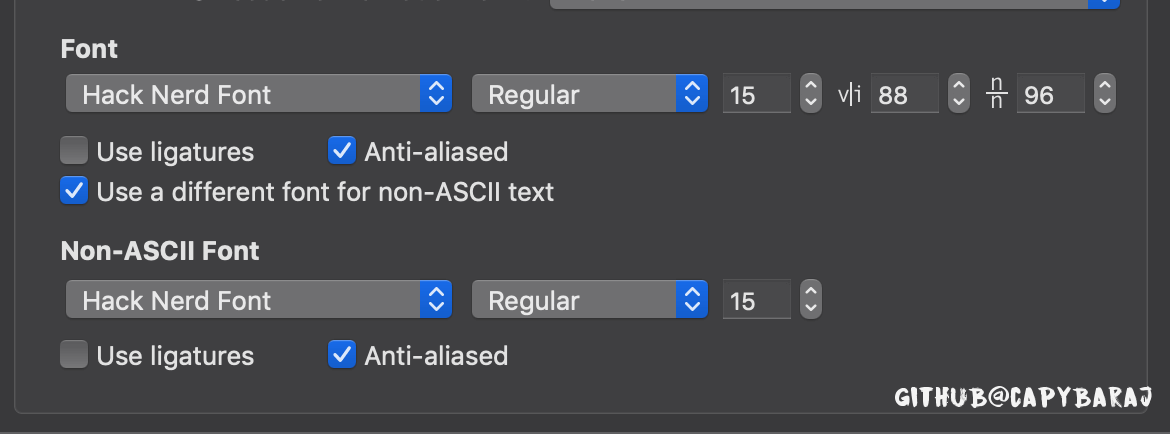
安装成功后需要在 iTerm2 中配置一下,在 iTerm2 -> Preferences -> Profiles -> Text -> Font -> Change Font 栏位中,Text 下面勾选 Use a different font for non-ASCII text,然后在 Non-ASCII font 点击 Change font 修改:
然后配置.zshrc,要注意,以前.bash_profile配置的alias和path都要copy过来。
1 | # 如果提示颜色域不够,就加这句 |
zsh插件
尽量不要用brew install下载,慢死了
zsh-autosuggestions
克隆仓库到本地 ~/.oh-my-zsh/custom/plugins 路径下
1 | git clone git://github.com/zsh-users/zsh-autosuggestions $ZSH_CUSTOM/plugins/zsh-autosuggestions |
用 vim 编辑 .zshrc 文件,找到插件设置命令,默认是 plugins=(git) ,我们把它修改为plugins=(zsh-autosuggestions git)
PS:当你重新打开终端时可能看不到变化,可能你的字体颜色太淡了,我们把其改亮一些:
cd ~/.oh-my-zsh/custom/plugins/zsh-autosuggestions- 用 vim 编辑 zsh-autosuggestions.zsh 文件,修改
ZSH_AUTOSUGGEST_HIGHLIGHT_STYLE='fg=10'
zsh-syntax-highlighting
1 | git clone git://github.com/zsh-users/zsh-syntax-highlighting $ZSH_CUSTOM/plugins/zsh-syntax-highlighting |
autojump
这个可以自行安装,但是我觉得z就可以代替了,还省的装
安装autojump:brew install autojump(确保有brew)
.zshrc里面添加autojump:plugins=(git autojump)
继续添加:[[ -s $(brew --prefix)/etc/profile.d/autojump.sh ]] && . $(brew --prefix)/etc/profile.d/autojump.sh
保存退出,重启终端
可能遇到的问题
iterm修改字体仅背景生效
添加如下代码
1 | #enables colorin the terminal bash shell export |
vscode显示iterm+zsh出错
这样配置后打开 VSCode 就变成这幅样子:

如何修复呢?只需要在 vscode 的配置文件中加入下面的配置:
1 | "terminal.integrated.fontFamily": "Hack Nerd Font", |
这样就会变成下面这个样子了。

iterm下的vim没有颜色
1 | syntax on |
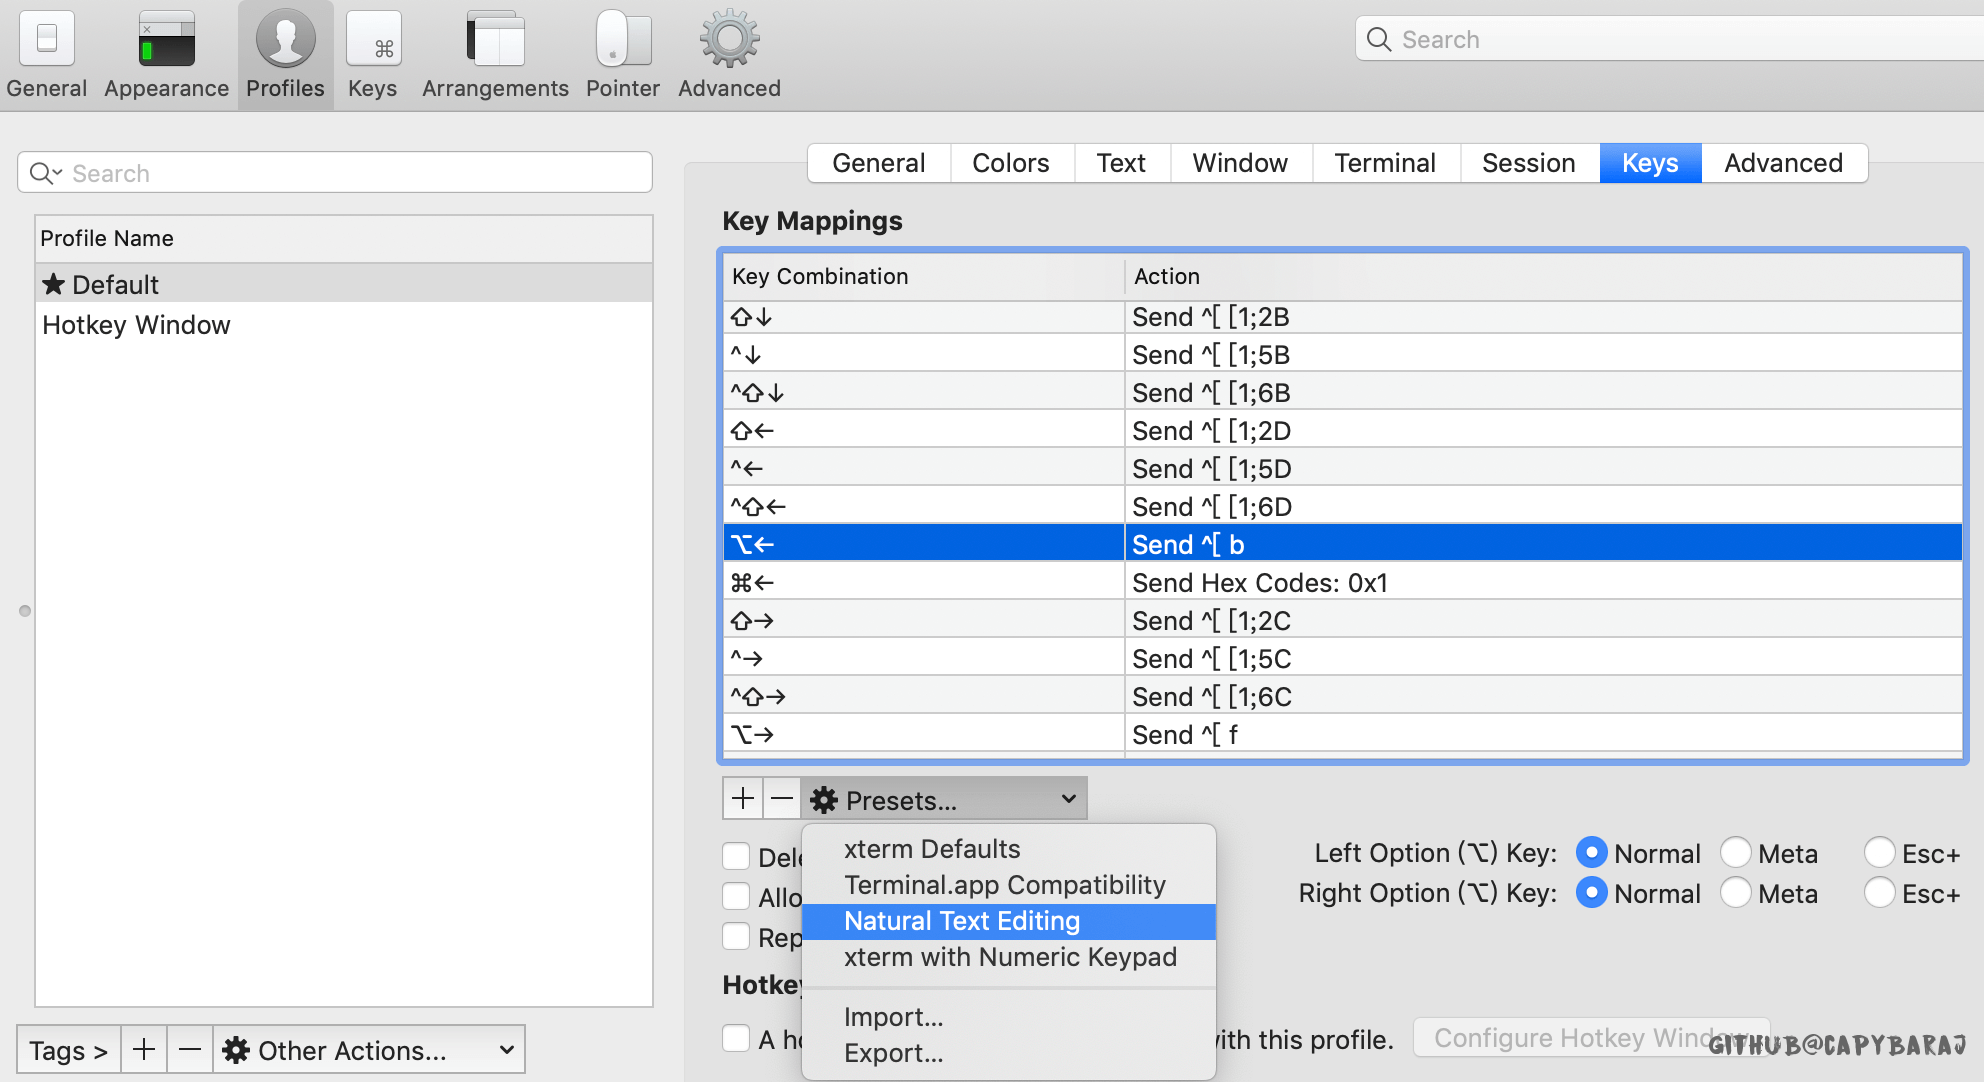
iTerm2 光标按照单词快速移动设置
在Mac自带的终端中是可以使用 option+←和option+→ 这两个快捷键实现光标按照单词快速移动,但是iTerm用这个快捷键没有反应!!!改成下面这个『Natural Text Editing』
bingo
iterm设置的hotkey驻留
https://gitlab.com/gnachman/iterm2/-/issues/8988
看这里,hotkey->window->All space
或者在做hotkey的时候,勾选『floating windows』
其它
扩展(转)
Mac终端配置,DIY你的Terminal (iTerm 2 + Oh My Zsh)
- iTerm2 默认使用dash改用zsh解决方法:
chsh -s /bin/zsh - iTerm2 zsh切换回原来的dash:
chsh -s /bin/bash - 卸载
oh my zsh,在命令行输入:uninstall_oh_my_zsh - 路径前缀的XX@XX太长,缩短问题:
编辑~/.oh-my-zsh/themes/agnoster.zsh-theme主体文件,将里面的build_prompt下的prompt_context字段在前面加#注释掉即可
 功德箱
功德箱